By Olivia Andrews, Second Year History of Art
The Croft Magazine // If you’re feeling like you need to release some tension or want to take the time to indulge in some selfcare, then facial massages are perfect, especially because of its ability to encourage endorphin release, collagen production and blood circulation.
Part 1: Facial Oil
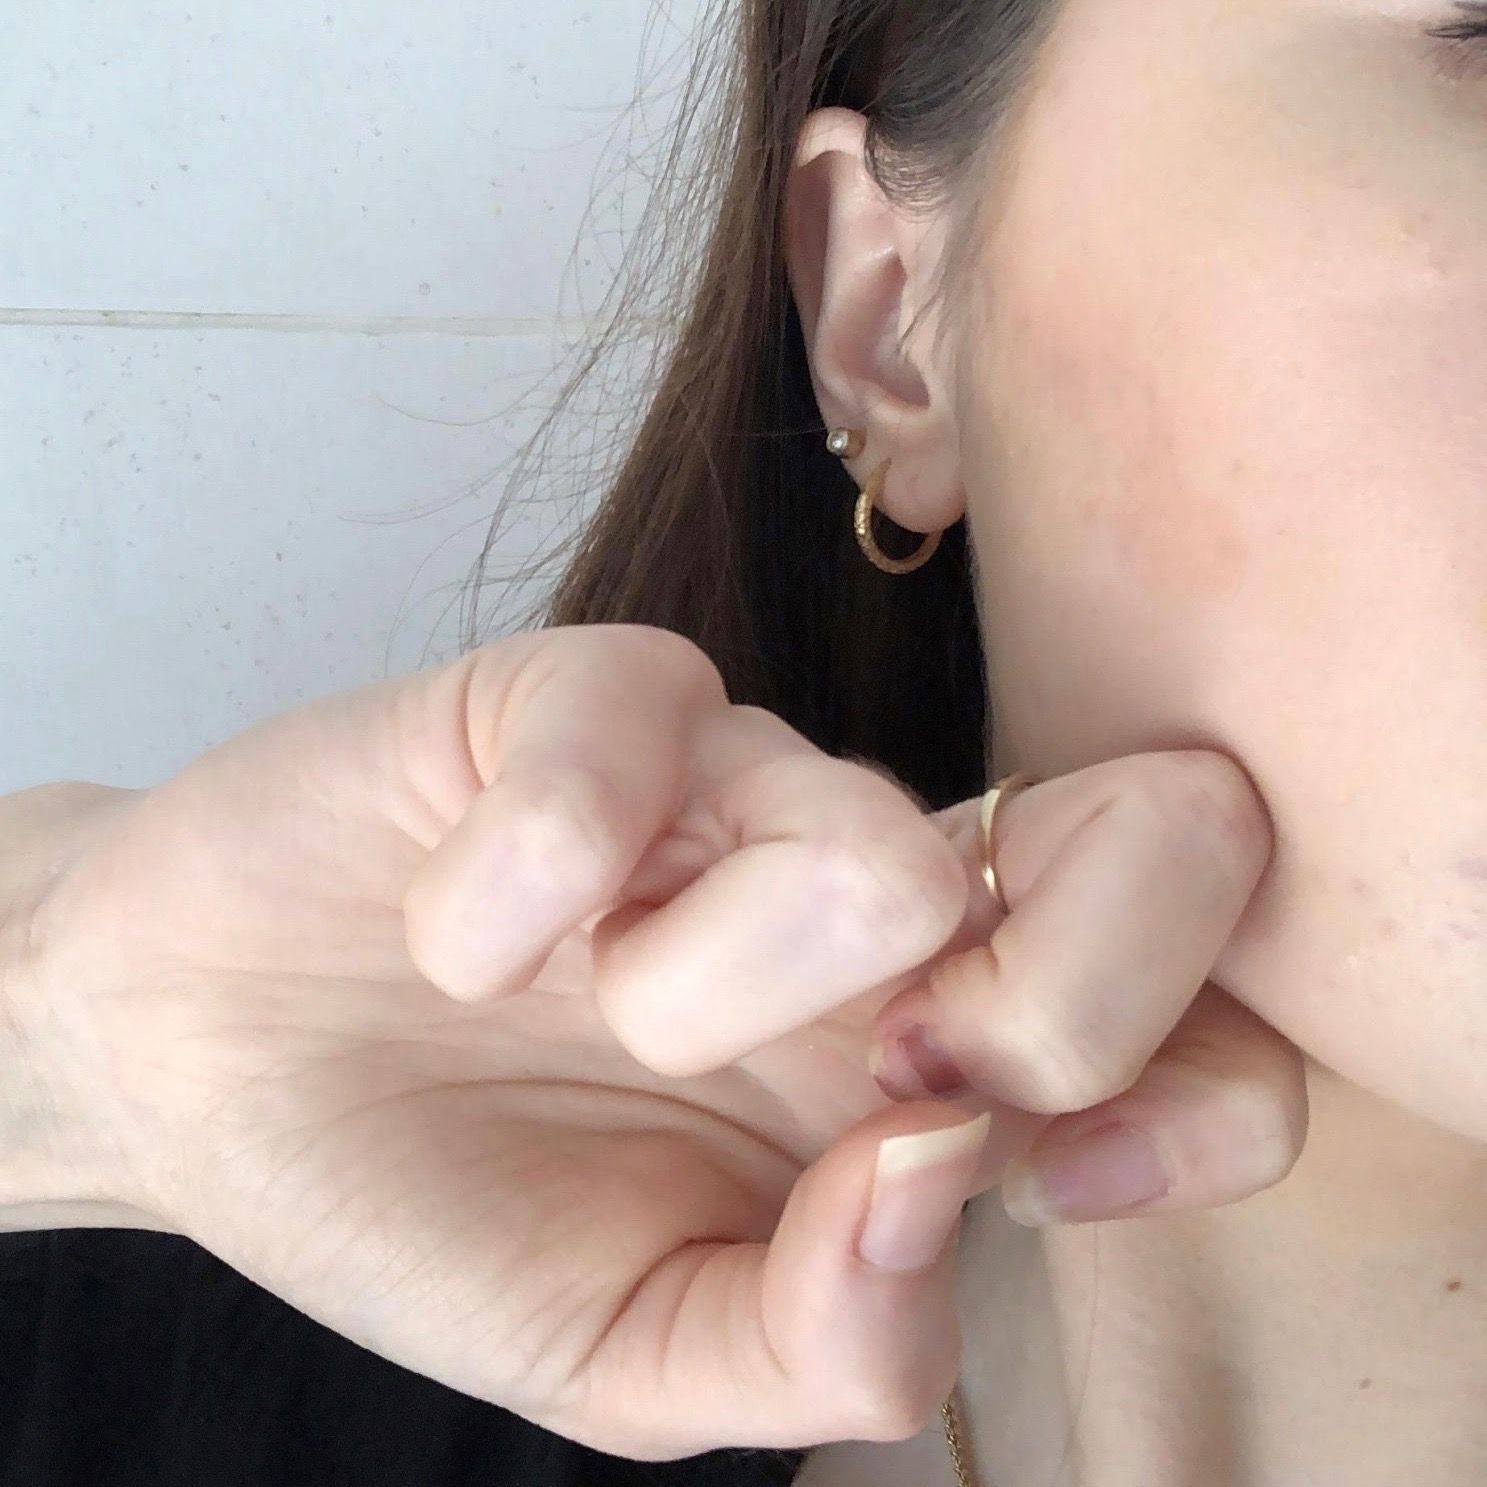
First grab a facial oil that you know your skin can handle, so your hands and fingers can easily glide over your face. I recommend one which won’t dry too quickly like The Ordinary Plant Derived Squalene Oil. Liberally apply it all over your face sweep upwards and outwards, just to make it easier to massage. To relieve tension in your jaw, begin by scrunching your index finger and middle finger on both hands and use your knuckles to drag across the jawbone, ensuring that the knuckles are in between the jawbone.
Part 2: Apply some pressure
Then taking the same two fingers of both hands again, create a v-shape just under the cheekbone and sweep up and out, under the cheekbone, maintaining this v-shape. Massaging here is great for lymphatic drainage, perfect for when your face is tired and puffy from your new distorted sleep schedule thanks to lockdown.
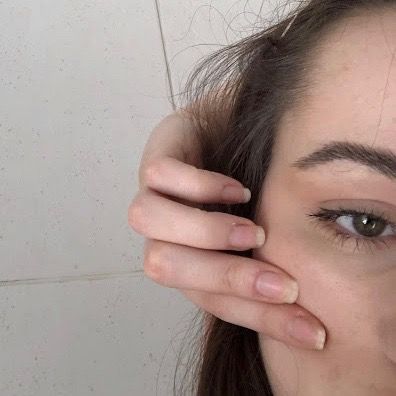
Part 3: Cheek-to-Cheek
This part looks slightly silly to do, take your left arm and wrap it round behind your head reaching your right cheekbone. You sort of have to tickle your cheek as though you are strumming each string of a guitar individually or impersonating a spider running and apply some pressure. Do this for around ten seconds and then switch sides.
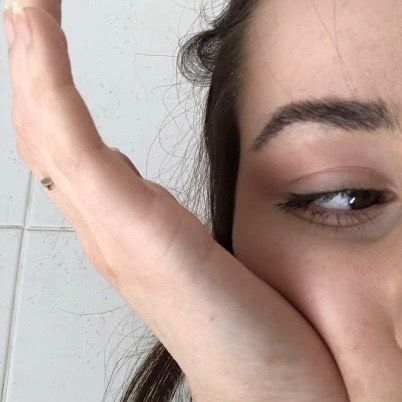
Part 4: Palm Power
Next, stick the bottom of the palm of your hands and rest your cheekbones here for about ten seconds, turning your hands outwards to the side of your face.
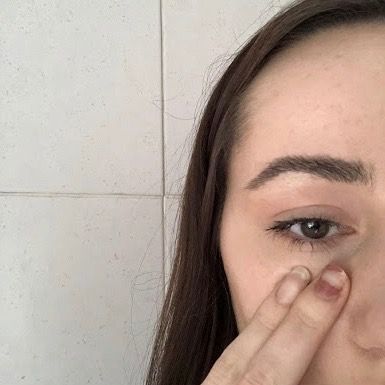
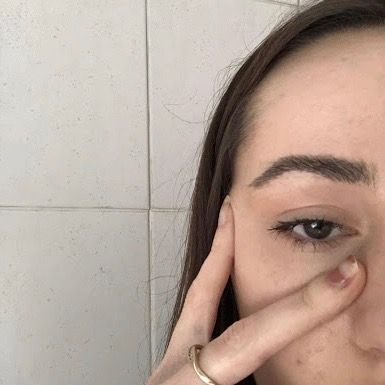
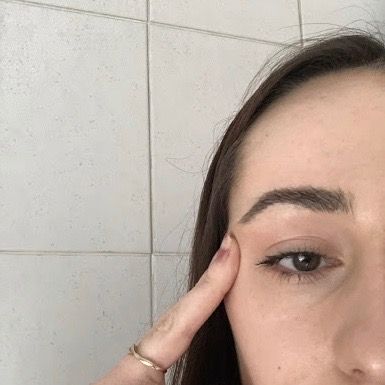
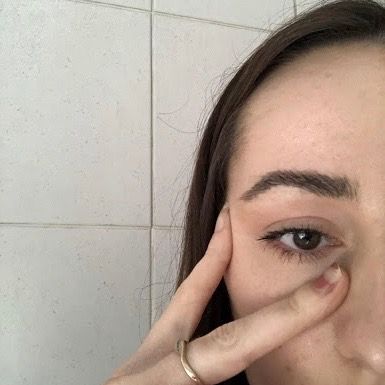
Part 5: Bright Eyes
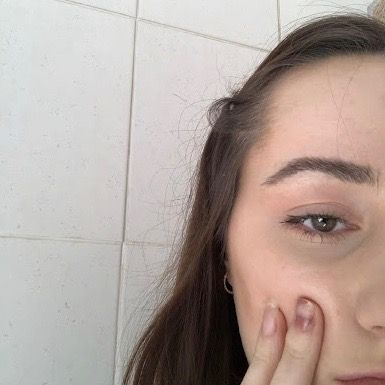
a)
This stage depuffs your eyebags, giving you a fresher more revitalised face. Take two fingers again, keeping them together, starting from near your nose under your eyes to under your outer eye near your temples and drag them across in sweeping motions.
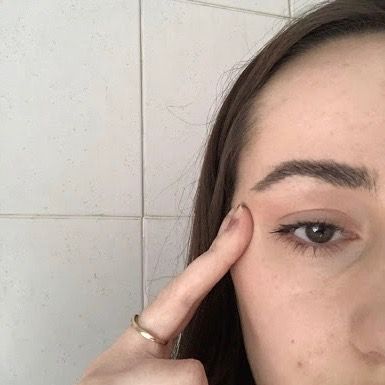
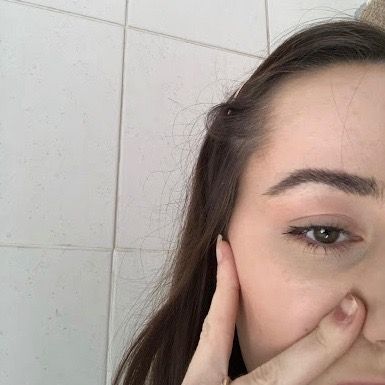
b)
Next, separate them, leaving the index finger on the temples, then the middle finger should sweep under the eye. To wake up this area and boost circulation, continue this motion back and forth a few times

c)
Then the middle finger can run circles around the eye including above, keeping the index finger where it is. Be sure to be gentle around the eye area as the skin here is extra delicate, so just repeating the process a few times over will be enough.

Part 6: Apply Pressure
Next take the palm of your hands and sweep them from the centre of your cheeks up applying pressure.
Bring your best look to your working from home office: The importance of getting dressed to successfully WFH
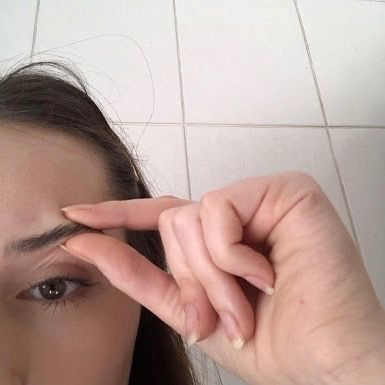
Part 7: Good-bye Tension
Finally, rest the tip of the thumbs in between the top of the nose, in between the brows and use your index fingers on both hands to pinch the brows and keep pinching moving along the brows and repeat a few times over. This part is perfect for easing tension, especially considering the fact that we unknowingly hold so much tension between the brows even from menial things like looking at our phone.
This massage is inspired by two of my favourite women to follow on Instagram – all in the know about skincare, Nichola Joss and Emma Hoaraeu.
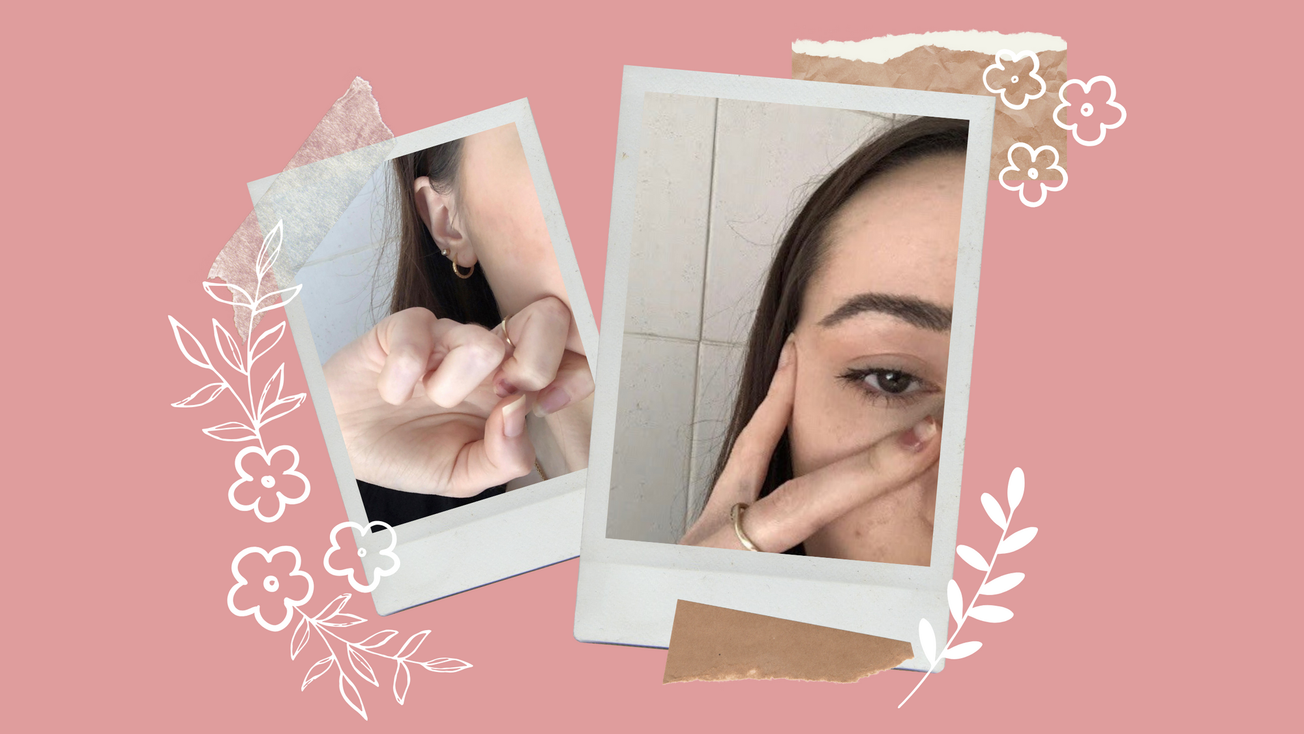
Featured: Epigram / Photographer - Olivia Andrews, Graphics - Laura Mallinson
Find The Croft Magazine inside every copy of Epigram Newspaper


